|
I guess we should start with a little background.
A few years ago (3 maybe 4) the lift pump went out on my 97 Dodge 2500 diesel.
Towed it to my shop, tore it down and replaced it. It wasn't a fun job but I
did get it running again.
Last winter/spring, right after got my Durango we took the truck in for a new
exhaust system and it just wasn't running right. It got worse after getting
the exhaust. Looks like they put a 3" on it instead of a 4" and I was pretty
convinced that had something to do with how it was running. Free advice being
what it is, we took it to the dealer and their less than stellar tech gave the
same diagnosis he gives every diesel that's not running right. "Lift pump and
injector pump. It'll cost around $4500". Like I said, free advice ...
There was no way I was gonna believe the injector pump went bad and the lift
pump was something that the dealer now replaces with an electric and remembering
the last time I did it, I decided on electric. The Raptor RP-150 seemed like a
good candidate so I bought one and started installing it. I'll leave out the
part where ya disable the existing lift pump since that was a whole 'nother
adventure (yeah, I dropped the plunger in the oil pan).
So I have the pump mounted, the new line run to the engine compartment, all
fuel connections are made and it's off to the back to hook up the feed. I laid
under that thing for over an hour trying to work them stupid quick disconnects
loose with no luck. There is nothing QUICK about them except maybe quickly
freezing themselves to the lines coming out of the tank. Eventually one of the
lines came loose - from the tank, not the quick disconnect. That connection is
still nice and tight.
Back to the forums again. Found a comment by a guy that said some friends of
his found that if you take out the front bolts on the bed/box and just loosen
the ones in the back you can tilt it like a dump truck. That idea works for
me! Turns out there are 8 bolts holding the bed/box on, two in the front on
each side and two in the back on each side. I tried taking out the front two
on each side and just loosening the back. Nope. Had to take the third ones
out too, then it just lifted right up. One handed even! (Yep, one hand on the
lever on the forklift raising it up)
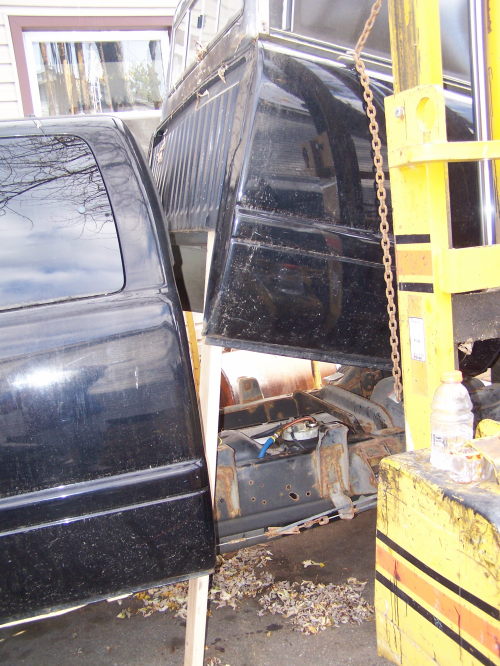
A couple of 2x4s for support and the top of the tank is right there in front of
me. Sat down on a 5 gal bucket and got to work.
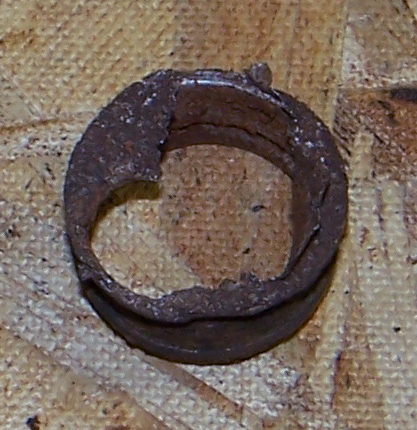
First I just pulled out the part that broke. EVERYTHING on that is at the least
heavy plastic or nylon except where the lines go into the tank. To describe it,
take a can of tomato paste (the short skinny cans) and cut an inch off of one
end. Discard the larger part and all the tomato. Poke two holes in the top and
shove two steel lines thru it. Secure the lines somehow (welded?). That's what
came from the factory. Called the dealer and the part is no longer available but
I can buy some of the lines involved for $250 each (not on my wallet I'm not - I
got plenty of tomato paste around here!).
Back to the forums. The first suggestion I got was to get a Vulcan Draw Straw.
Thought to myself after reading that, "good idea, lets check out the forums". But
he did provide a link. Clicked on the link and hey! Vulcan Diesel Performance and a
DrawStraw I.
That's exactly what I need! Did some inquiring with Vulcan and was just about to
order it - then I looked at the upcoming weather forcasts. No way (without express
shipping) was I going to get that here before the weather really turned nasty so
it was back to the first thought I had. Making one.
Looking at the old tomato paste can ...
I took some measurements of the rusted out piece of junk and came up with this:
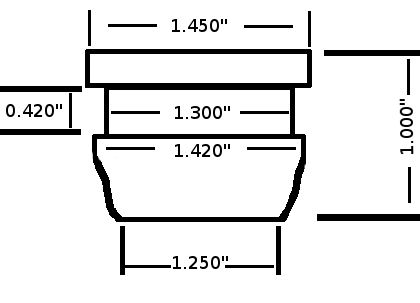
Most of the measurements aren't 100% critical, but the 0.420" and 1.300" are. That's where the factory rubber grommet goes. The step below that should be close to 1.420
since the grommet has to somehow make it over that.
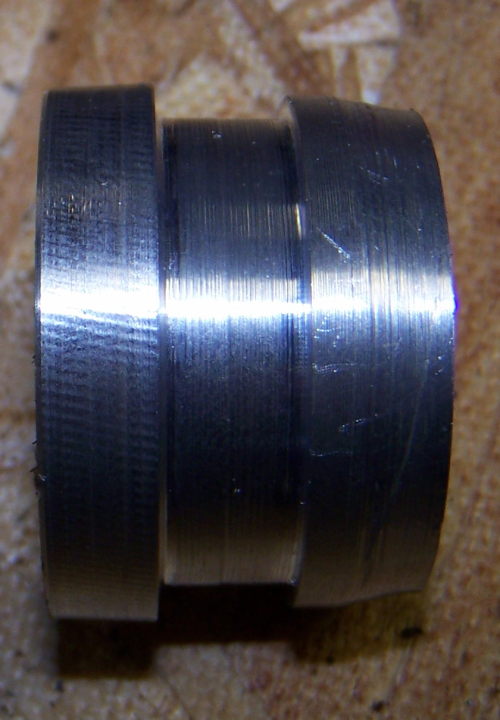
First cut off a piece of 1.5" aluminum bar
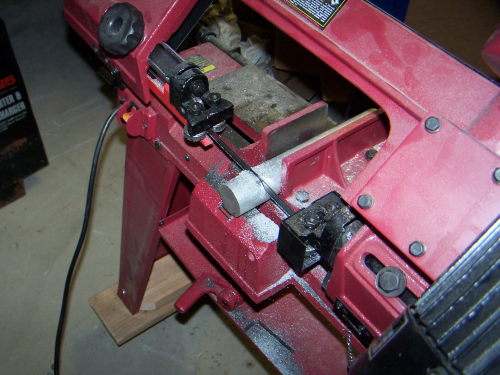
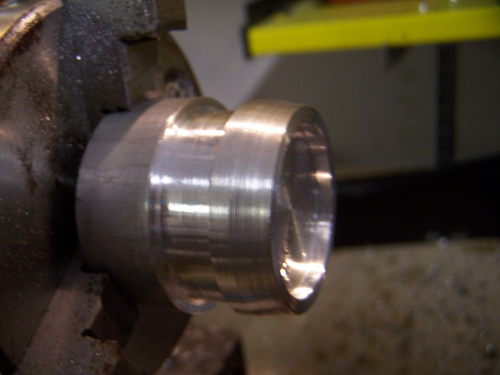
Then turn it down in the lathe to the above dimensions.
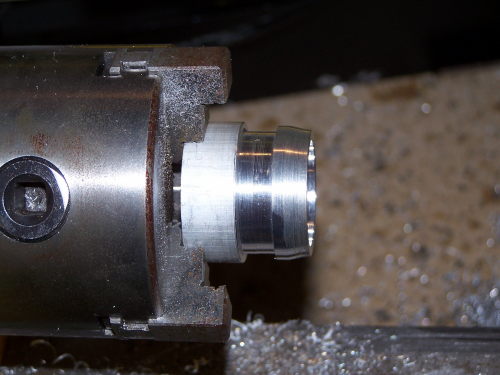
I also hollowed out the inside of the tapered end to about 1.100" wide maybe
an 1/8" in deep. That will be filled with JB Weld to hole the tubing later.
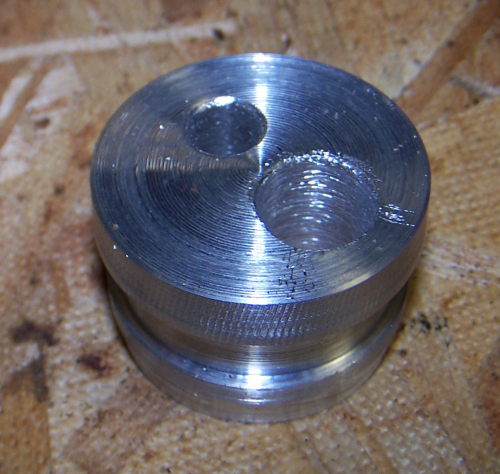
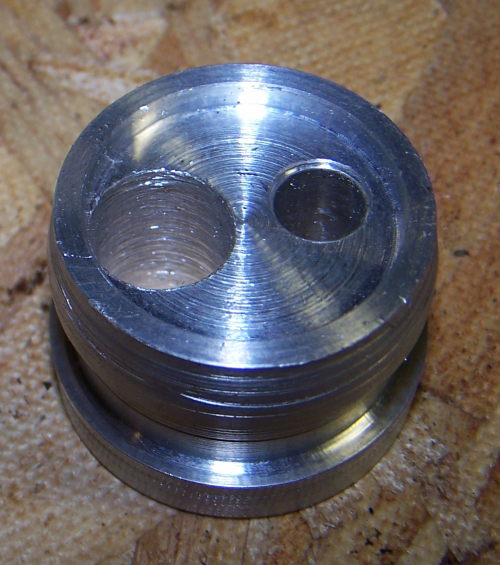
Then I drilled for the two lines, 1/2 and 5/16. Note the surfaces are rough. This was
intentional for the JB Weld to have something to adhere to. A finishing bit would have made it look nice in a few seconds.
The rubber grommet is in place and the JB Weld is filled in the bottom. I used Permatex Hi-Tack around the lines where they go thru the aluminum feedthru. You can see where a little dripped out onto the vise. 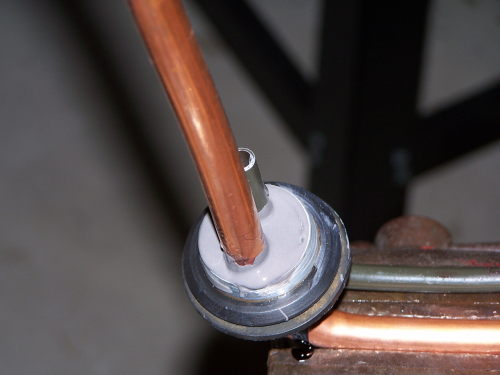
Assembled on the modified fuel module, there a few parts that need to be removed from the inside of the module. Original pickup tube, etc. At this point the tubing still
needs to be adjusted for what direction they'll face. Then the copper tube will be
bent slightly to point to the center of the module. 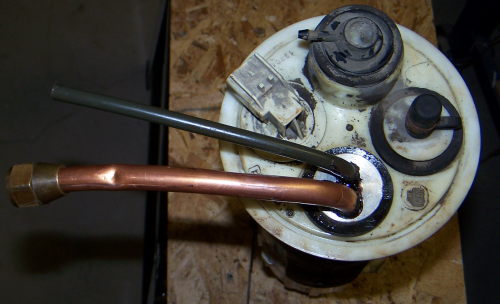
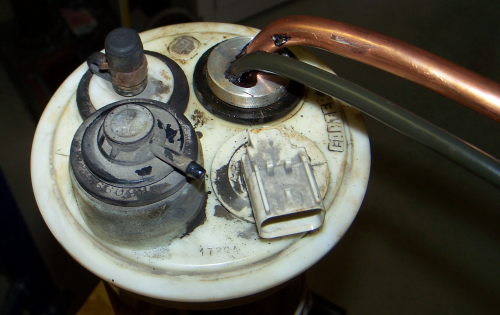
In the tank, mounted, sealed, adjusted and the lines attached. The intent was to also put JB Weld on the top (the stick stuff) but the way everything was sitting and tight I didn't see the need for it. 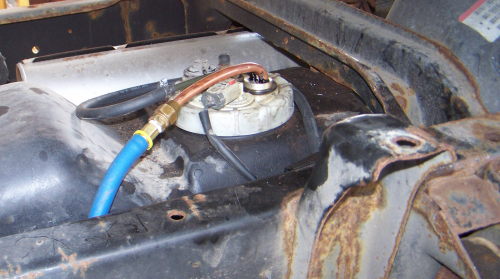
After that was hooking up the electrical, purging the air and starting the truck. The old Dodge did indeed start after all the air was out of the injector lines and ran/runs great! Back to that free advice - the injector pump is still fine.
If I had it all to do over again, I would have started earlier in the summer or even spring and used the DrawStraw. But had I started earlier I wouldn't've known about tilting the bed/box as opposed to removing it.
|